Showing posts with label pond. Show all posts

Sunday, 26 January 2014

Life In A Time Warp!

Okay, look, I know - and I'm feeling guilty about it, alright?! I haven't posted in forever, I missed doing my Christmas and New Year post altogether and it's suddenly the end of January and I don't know how I got here so quickly...so the only answer is that  there's a problem with my space-time continuum again and I'm stuck in a time warp that is distorting everything and making October actually just yesterday for me!!!

So, guilt gone and I've accepted I am now really in January - it must be true because I know it's been raining forever and I'm heartily sick of it. It's a wonder Britain doesn't sink with the weight of all that water on our sodden land!

I'm going to use my useful time warp and transport us back to the hazy, crazy but not so lazy days of last summer to show you the work on the bottom pond...at last! :-D
Ooops, I've just realised from looking at the dates on the photos that building the reservoir actually happened in April 2012, but we didn't get any further then because the awful weather set in for the rest of the summer and it was never dry enough for long enough to get the pond finished!

Right. Get yourselves a nice cup of tea, or whatever takes your fancy, and sit back and enjoy the ride!

Given that Himself is a reincarnated Victorian engineer, it wouldn't have been right if  we'd built a reservoir without him having to produce some wonderful contraption to help it along.
He made 2 cruciform wheels of spokes.....
 to go in place once he'd cleared out,shaped, sized,  levelled and put sand in the bottom of the long dug out reservoir pit. He then made a cylinder of 2 layers of hardboard - the inner one was shiny side out, the outer one was shiny side in and was 2" bigger in diameter - the reasons for this will become clear in a minute!
 The two cruciforms wedged the inner cylinder in place and kept it circular. The outer cylinder, being bigger, left a 2" gap for concrete to be poured in and we used offcuts of tea house insulation  to wedge the out cylinder in place. I'm a really good mixer of concrete (she said, modestly!)
 Once the concrete was set, we took it all apart, raised the cylinders and cruciforms up and repeated the process twice more - with a week between each move to let the concrete harden off. It was hard work and Himself proved to be a bit of a contortionist as he clambered inelegantly in and out of the hole with increasing amounts of stuff in it!
 The result? A beautifully cast concrete reservoir! Himself is a star!
 Now you're probably wondering why we needed a reservoir? Well even if you weren't wondering, I'm still going to tell you. The top pond is considerably larger than the bottom pond. It holds appoximately 6000 litres (or 1300 gallons if you prefer) and the bottom pond only holds about 2000 litres (500 gallons), so every time we switched on the pump to run the stream, the bottom pond water level went down about 2 feet - because the water level  in the top pond needed to rise by a couple of inches in order to get over the lip of the waterfall stone - but more about that later!

In the next photo, the green hosepipe shows the shape of the finished pond. It had only been, up to this point, a hole with a liner in it so that we could get the water levels right and check that the stream worked. It had never been properly dug out, shaped, shelved and 'done'. Part of the problem in getting it done was that I wanted the pond to extend across the skanky old path, part of which I'd already removed, hence the manky flagstones......

 and it was at the top of some equally skanky old steps!!! Yeah, yeah, I know ...first I build ponds under treees, then I put them at the top of steps!
We pumped the water out of the pond hole to let us access the hole.
 Anyway Himself , as ever, had a cunning plan to deal with my idiocy! He took out the old steps, used a few chunky pieces of pond stones to construct a dry stone wall to join up with the hideous old wall on the right (which at some point will be replaced with a nice wall!) and then he backfilled it with the topsoil we'd had lying in a heap from when we originally dug out the pond hole about 5 years ago!
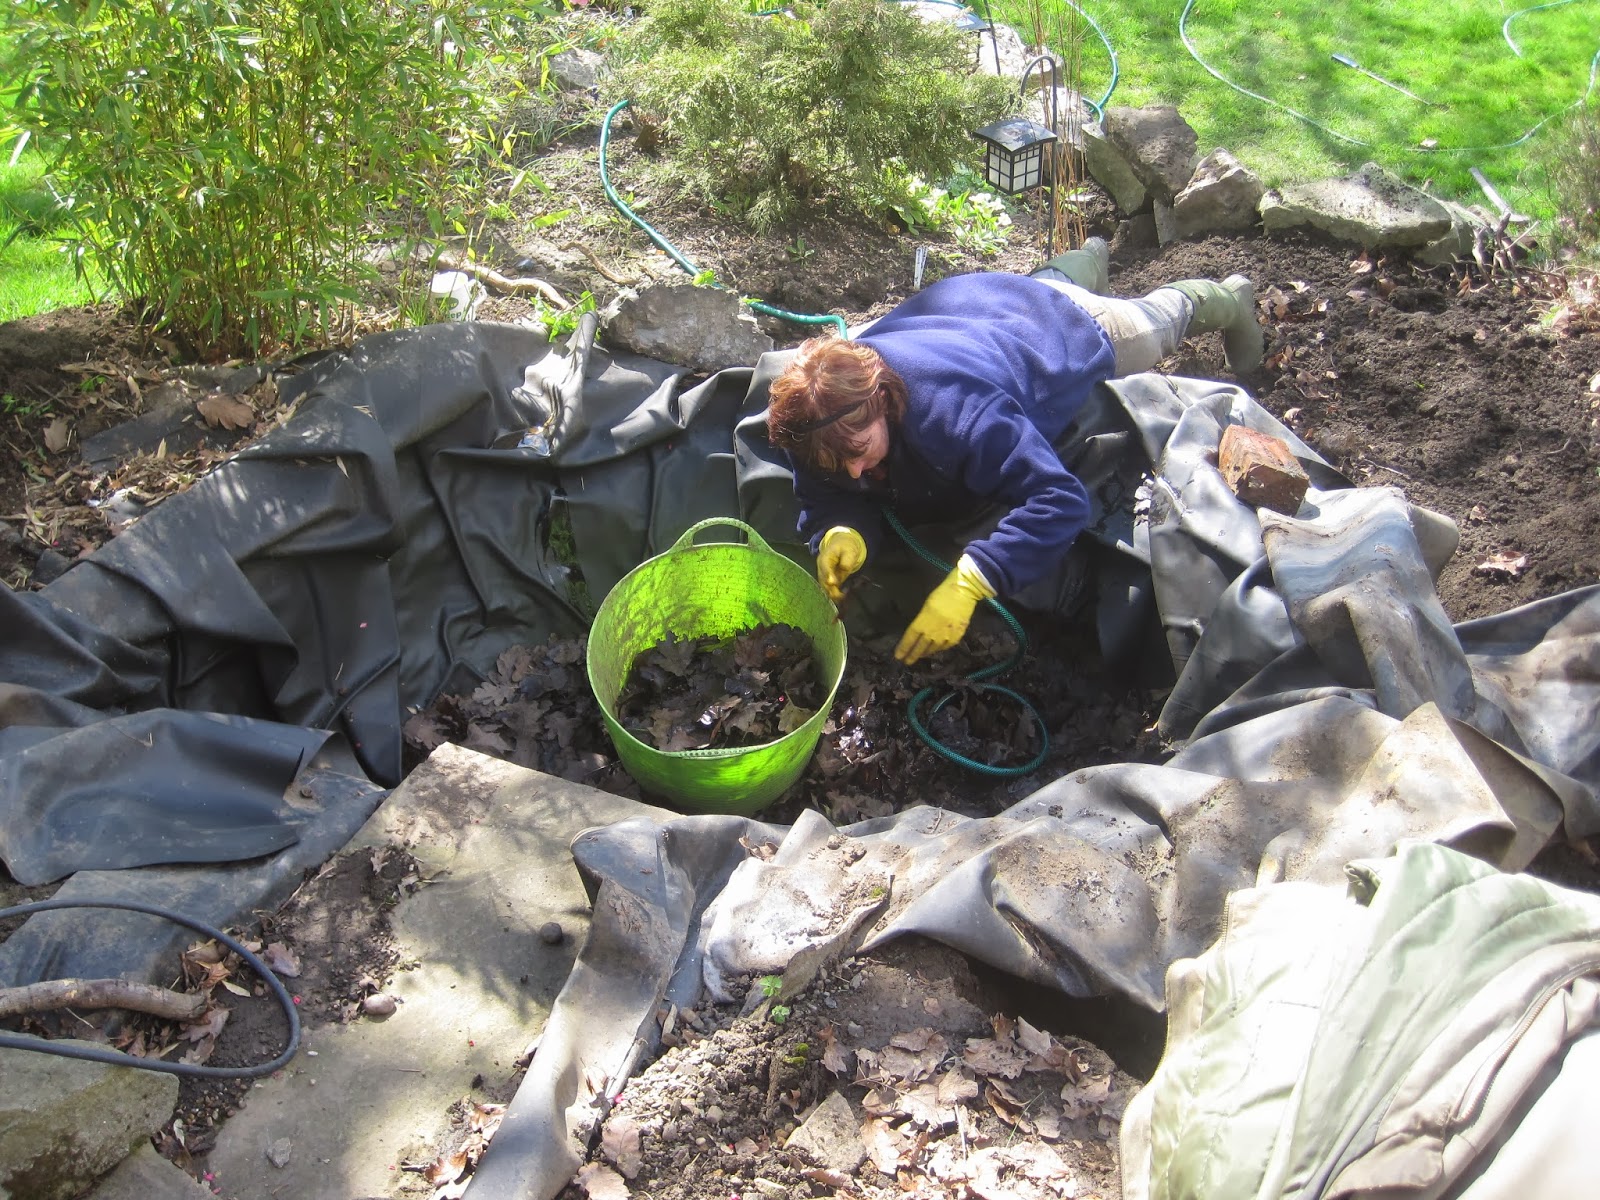
I then had the dubious pleasure of clearing several years worth of leaves, gunge, frogs, newts and assorted other squirmy things out of the  bottom of the hole. Balancing somewhat precariously on the edge of a hole where the bottom was juuuust deeper than I could safely reach did wonders for my core muscles - ouch!
 Then liner was then removed and Himself went all technical again. I pointed out where I wanted the shelves to be. He then carefully worked out all the levels and did the scary bit of drilling the hole through the concrete to put the outlet pipe in place. No use having a reservoir if you can't get water in or out of it!
 The outlet pipe was fitted - after a bit of a struggle in a confined space again, but at least there were no cruciforms in there this time!
 and backfilled with soil, then a layer of  builders sand on top.
 The tank was lined with fleecy pond underlay
 and then, with Ower Dave's help, a specially made 'top hat' shaped butyl liner was carefully put into place and glued down.
 The rest of the pond was properly dug to size and levels. Ower Dave lined it all with fine sand - that I had spent hours making from the sandstone I'd dug out of the pond holes years ago and stashed up the garden on some tarpaulin. It just needed a bit of bashing and putting through a griddle.
 We filled the reservoir, checking carefully for any leaks - and, of course, there weren't any!
 The fleece liner  was put in place and swept clean of any small stones and grit
 before the butyl liner was finally laid...after sitting in the shed for 2 years!
 Himself cut the hole in the liner for the outlet pipe and fastened the outlet seal in place
  and we left it to fill up with water
 ...and it stayed that way for a whole year!
To be continued........!
Oh, and Happy New Year everyone!

Sunday, 6 December 2009

The frame goes up at last!

Thank you to everyone for your concern about David following his recent surgery. I am very pleased and relieved to announce that all danger has passed, he is well on the way to recovery, had his first short, chilly walk around the garden yesterday and is thoroughly bored - always a good sign!

Given all the above progress, I thought it was time for the promised post on the day David came up to help us build the tea house frame on site - because, as Himself commented, David was absolutely the best person for the job! As a surgeon, David has had to be thorough, meticulous, precise, not panic when things go wrong and not rush things (sound familiar?!), all of which suited Himself down to the ground for putting the frame together!
First though, I had yet more painting of the 3 coat sealant to do!

The dry beams and posts were carried onto site - about 100 yeards up the garden!
Himself had earlier removed the posts that he, I and the Gnomelets had previously erected twice (*sigh*) then he and David began to lay out the pieces like a 3D puzzle.


Daring to glue the first joint!

Of course, being Himself and David, a few screws went in too ..... just to be on the safe side you understand - can't be too careful!

Checking the diagonals to ensure the corner angles were all even.

The long side of the frame in place, levels being checked - and, oh look, I'm balanced on a wobbly plank over water again! I am convinced that Himself thinks that if he puts me on a plank across the pond often enough, at some point I WILL fall in - and that'll be his payback for all his hard work. Mwahhaahaaa!


Some joints needed a bit of persuasion to go together after glueing, so we brought out our trusty strop and hand ratchet (originally used for pulling me - well, the Land Rover actually, out of muddy holes in off road driving competitions!). It works just as well for pulling chunks of wood together though!
Guess who got to walk the plank again?

Squatting down to put the strop round the bottom beam didn't make me fall in even when Himself 'accidentally' kicked the other end of the plank, so he then had me up on my tiptoes to shove the strop as high up as I could reach - ostensibly to pull the top posts together, but I knew his cunning little plan.........!
David meanwhile happily carried on glueing the next set of joints, seemingly oblivious to his son's nefarious tricks to dunk me in the drink!


Don't be fooled by that innocent expression of concentration as he tightens up the ratchet, he was really planning his next move!


Having failed to get me wet, Himself resorted to putting up the back wall frame and muttering to himself about "....her improved balance.... chunter, chunter"! David happily carried on holding posts in position.


Moving swiftly on to erect the long side wall against our boundary.

Got to keep checking those diagonals boys!
The strop was used for fine-ish adjustment.

Bracing was put in place to provide some short-term stability and rigidity to the structure whilst the concrete went off.........

Each upright post had a stainless steel 'foot' which was concreted into a post hole. Of course plain simple concrete wasn't considered strong enough(!), so stainless steel wall ties were threaded through the foot and angled into the concrete - just to make sure!!!

As Technician, Third Class still working on my promotion prospects, I was allowed to pour and shape the cement - making sure that it sloped away from the foot for drainage.

As Gordon Ramsey might say........."Framework -Done"!


and I still hadn't fallen in!

Saturday, 31 October 2009

The second post!

October this year has been glorious .......warm, dry, balmy sunny days with blue skies and very little cloud or wind. So warm in fact that last night I walked down to the local Indian restaurant without a coat on! However, November has arrived with a bang today - the temperature has plummeted several degrees overnight, the sky is steely grey and the horizon is invisible because of the rain pelting against my windows- which are rattling ominously in the face of the gale. The leaves are flying past horizontally, to eventually land in sodden red heaps on the drive and the lawn but I am safe and warm inside, huddled up in my snuggly hoodie and fluffy boots (well, and my jeans - obviously. I'm not that weird!).
Welcome to Autumn, Derbyshire-style!


Let me take you away from the dismal day outside and back to hot sunny days when the world felt good ......... and the second post went into the pond! Chris and OJ weren't around to provide muscle, so we roped the Gnomelets in to help. That was it - three girlies and Himself, our full workforce for the day!


Himself wanted to do things the same way as last time but, despite my love of adventure, I refused point-blank to stick my head down a muddy, mucky barrel whilst balanced precariously on my knees on a wobbly plank over 4 foot of very wet water!
Another way had to be found!


I was convinced that the way I had suggested last time (and been ignored about!) had to be quicker and easier - especially given our current lack of muscle, so Himself agreed to give it a go. We tried it out first on the original post because Himself wasn't happy with how the post was sitting on the cement-filled pillow. He'd accidentally made the mix with sharp sand rather than building sand, so the mixture didn't 'flow' in the pillow and had set lumpy (note excellent use of technical terminology there!), causing the post to be unstable and not truely vertical - a problem which, if not resolved, would have a knock-on effect throughout the rest of the building. We used the chain-hoist to raise the post up and out of the way and lifted up one edge of the pillow with my big leaf catching net so that Himself could reach it to lift it out of the pond.

We then made a new pillow filled with a nice flowing cement mix .....


slid it into the pond .....


pushed it into place with the handle of my trusty net ......

checked it was in the right place ........ ooh look, I'm on my knees on a wobbly plank over 4 foot of water!

lowered the post back down and popped the wooden post back on top. Easy!

Now convinced that this method would work (!) Himself did some precision measurements for where the second post should go .....


sighted it against the first post now sitting snuggly and vertically on its new pillow.....


then we did the same process with the second post.

For some reason I was back to my old familiar position of 'counterweight and shover of big beams with heavy things on the end' ........... but apparently this does not yet qualify me as Technician Third Class, it only keeps me at Grunt Worker level - one day I shall achieve promotion ...well, a girl can dream can't she?!!!

Placing the post onto the plank .....


First-Born in charge of the chain-hoist and lowering the post into the water - I have to say she wasn't exactly thrilled at the prospect!


post in place and being checked for stability on its pillow .....


and the really exciting bit ......... the first horizontal post is brought into play!


getting nearer .......


and nearer ..... it was flippin' heavy and jolly unwieldy too! Oh look, yet again I'm on my knees in an unstable position near water! I'm begining to think that he's secretly trying to topple me into the pond!


Having got the beam into place, Himself decreed that we should take both bits back onto dry land, assemble the two upright posts and the horizontal beam there, then lift the whole job lot onto the concrete posts - simple eh?!


When Himself was using a bit of persuasion I became the brace ....... suppose it made a nice change from being a counterweight! (but still no promotion!)


We then carried/walked the completed structure on wobbly planks out to the posts. Himself's plank is precariously balanced on the edge of the concrete post!


The structure was carefully lifted into place so that the holes in the bottom of the posts corresponded with the metal locators on the concrete posts and pushed down to fit tightly onto the posts. It was hard work!


Enlarge this photo and look at the bubble in the spirit level - precision engineering or what?!


Finished - and tied off on a couple of suitable posts to keep it vertical whilst the cement set.


Total time taken = 3 hours :)
Total time taken to get ONE post into the water last time = 5 hours and one wet Chris!!!

and there I rest my case m'lord!